26 Jul 2019

Peek-a-boo card


I came across peek-a-boo card from one of Jennifer McGuire’s video and was intrigued. Glad, I finally found time to make one. I am just sharing what I did, for details on how to make this type of card, pop over to Jennifer’s blog or youtube channel.


First, you need to cut 3 card with the following sizes: Front of the card (4¼ x 8¼ inch, scored at 2¾ inch), the inside of the card (4¼ x 8½, scored at 4¼ inch) and the back of the card (4¼ x 5¾ inch, scored at 5½ inch). 


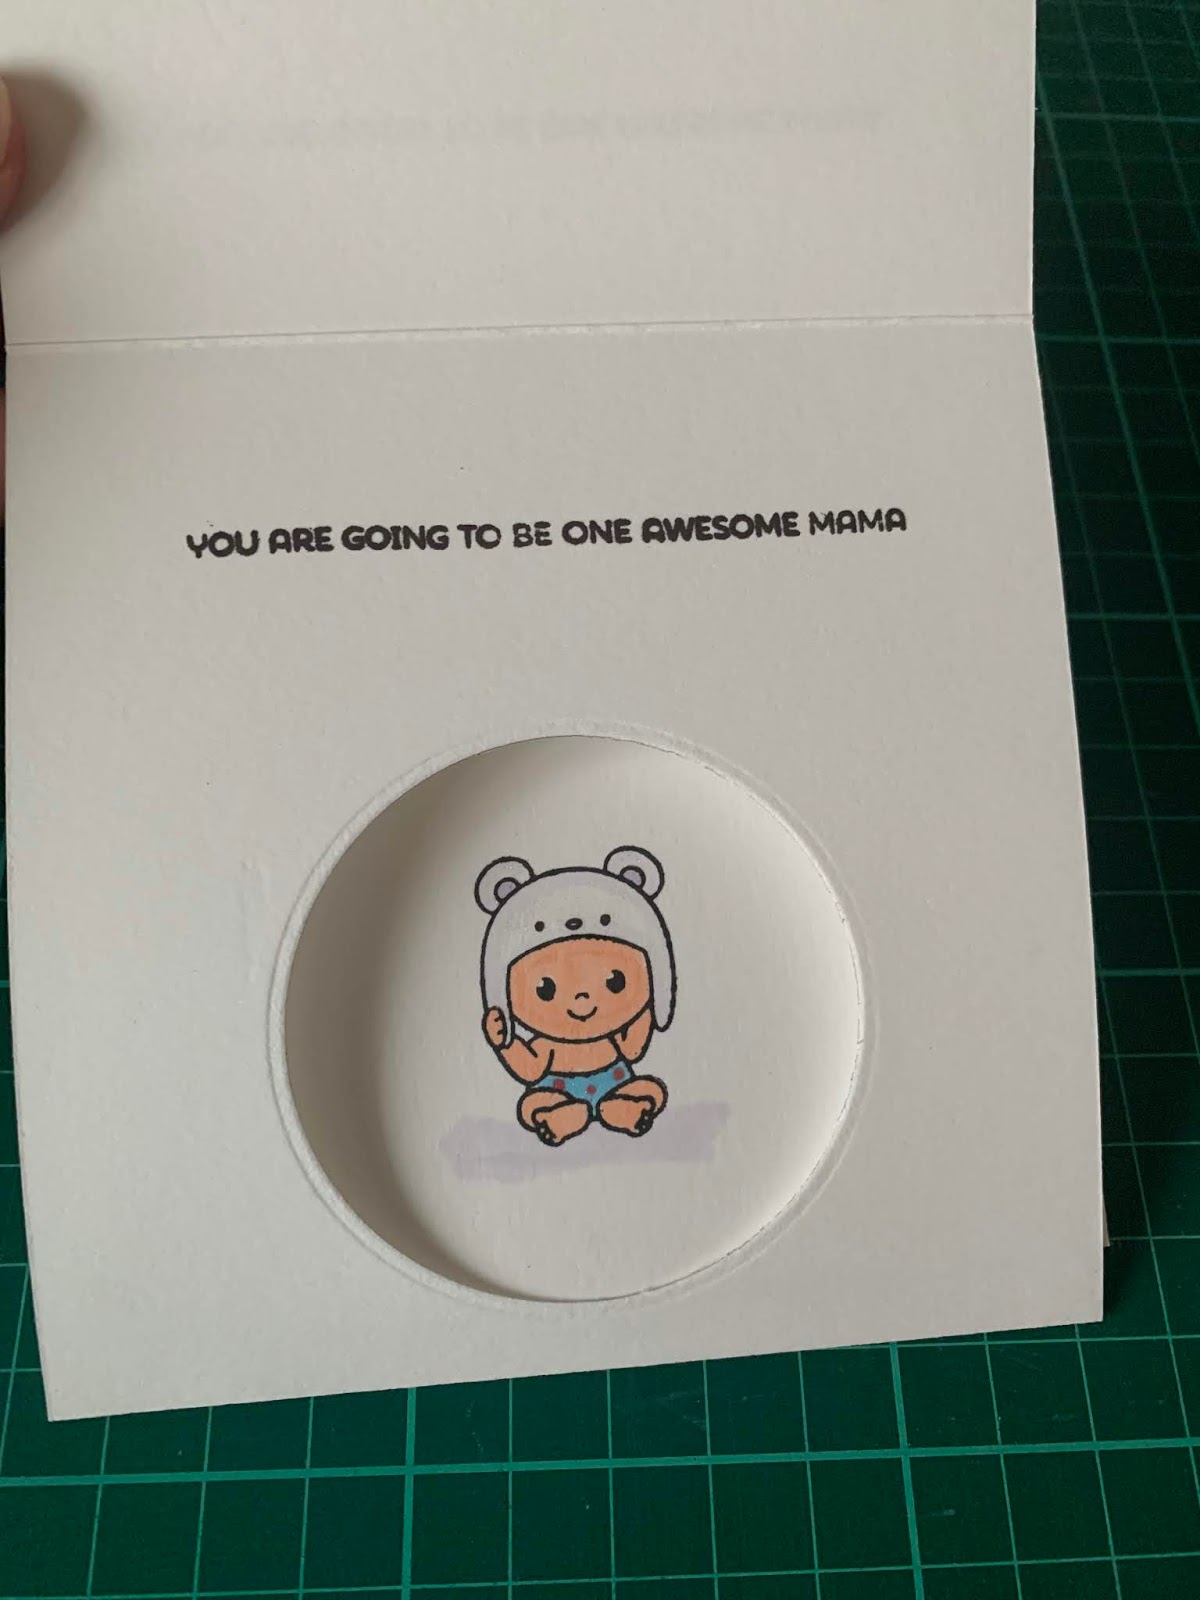
Die card a circle window in the same position on the right half of the front panel and the inside panel. To do this, I temporarily taped the 2 pieces of card together and die cut them together. 


Next, I stamped the cow and pig on 2 circles that slightly larger than the die-cut circle and coloured the images. For the babies card, I just stamped the baby images directly onto the card as I did not like the card pieces getting stuck (even with the tape trick).


To assemble the card, tape/glue the back card and the inside card together first. Then line up the front card with by aligning the circle die cut and glue them together. The flap on the front card with the image with fit in between the inside card and the back card.

As you open the card, you will get the peek-a-boo effect. 


Hope you enjoy today’s post


7 Jun 2019

Box pop up card pony party


Hello and welcome! I have 2 box pop-up cards to share with you today. These are another fantasy theme card, with rainbows, ponies, unicorns and birdies having a FUN party in the clouds.


1) Like the last card, the first step is to die cut the Lawn Fawn Scalloped Box card pop up and the various panels.


 2) For the first card, keeping in line with the sky theme, I used star filled patterned paper from Forever Friends Christmas Snow paper pad for the side panels. For the second card, I used Forever Friends Spring Time paper pack to have a flowery spring feel.


 3) For the first card, the front panel of the card was die cut so that it is also a window card. Clouds were added to the inside panel with MFT Mini Cloud edges stencils and Altenew Sea Glass ink.


 4) Ponies were from Simon Says Stamp Mini Pony Party, the birds were from MFT Happy Hippos. Clouds were die-cut from Mama Elephant Rainbow High. For the second card, the clouds were die cut from tracing paper and coloured with copics from behind.


5) The sentiments were from Mama Elephant Make a Wish and Simon Says Stamp Mini Pony Party


6) Finally, all the images were put together onto the box pop-up card.


I hope you like today's cards and have a great day ahead!


3 May 2019

Pop up box card - Fairy Garden


Hello and welcome to my blog. I hope you will enjoy it. Today I am sharing my fairy garden with you. This is a box pop-up card. I did a box pop-up card a while back and a lot of people like it, and it was super fun to make. Hope you will give it a try.

16 Apr 2019

Framed Fairy


Hello and thanks for dropping by! It’s been a while since I craft as I was busy with some personal stuff. Recently (finally), I bought a shelf to store all my crafting equipment and materials and re-organised by crafting area. Whilst doing that, I found some images that I had stamped and colored but never used on a craft project yet, and I wanted to use these pretty images.

6 Feb 2019

Christmas 2018 - Reindeer


Welcome to my last card for this Christmas card series. Thank you for dropping over. I really appreciate your support. This is another quick and simple card to pull together. I loved this red and gold felt reindeer die-cut which I had in my stash so I wanted to use it. 

31 Jan 2019

Christmas 2018 - Xmas tree


Hello everyone and thank you very much for dropping by. This card is very similar to one I did last year where I used my favorite Christmas items and made them into a wreath. This year, I arranged them into a Christmas tree.

20 Jan 2019

Christmas 2018 - slider card


Hello everyone!

This year I did not make as many cards as I had wanted. But I did made some for close families and friends. I hope you had more time to craft than I had. Today I am sharing a couple of fun, slider cards that I made with my nephews and a dear friend in mind. Slider card is an interactive card where one or more components on a card can move.

14 Jan 2019

Christmas 2018 - Birch Tree


Hello and welcome! I had been ill on and off for the past 2 months and I just realised that I had totally forgotten to share my Christmas cards last year! OMG!

I had a couple of shaker cards to share with you today. Shaker card is an interactive card with a clear front and tiny elements inside the card that will move around when the card is shaken. All these cards have birch trees as a backdrop.