26 May 2020

Concord and 9th Dahlia Turnabout


Hello.  Thank you very much for dropping by my blog. Concord and 9th has quite a few turnabout stamps in the market. I finally got the Dahlia Turnabout stamp which will fit nicely with a Mini Misti (which is the only stamping tool I have) and made several cards using it. The cool thing with this is that you can use different colours and have totally different looks.


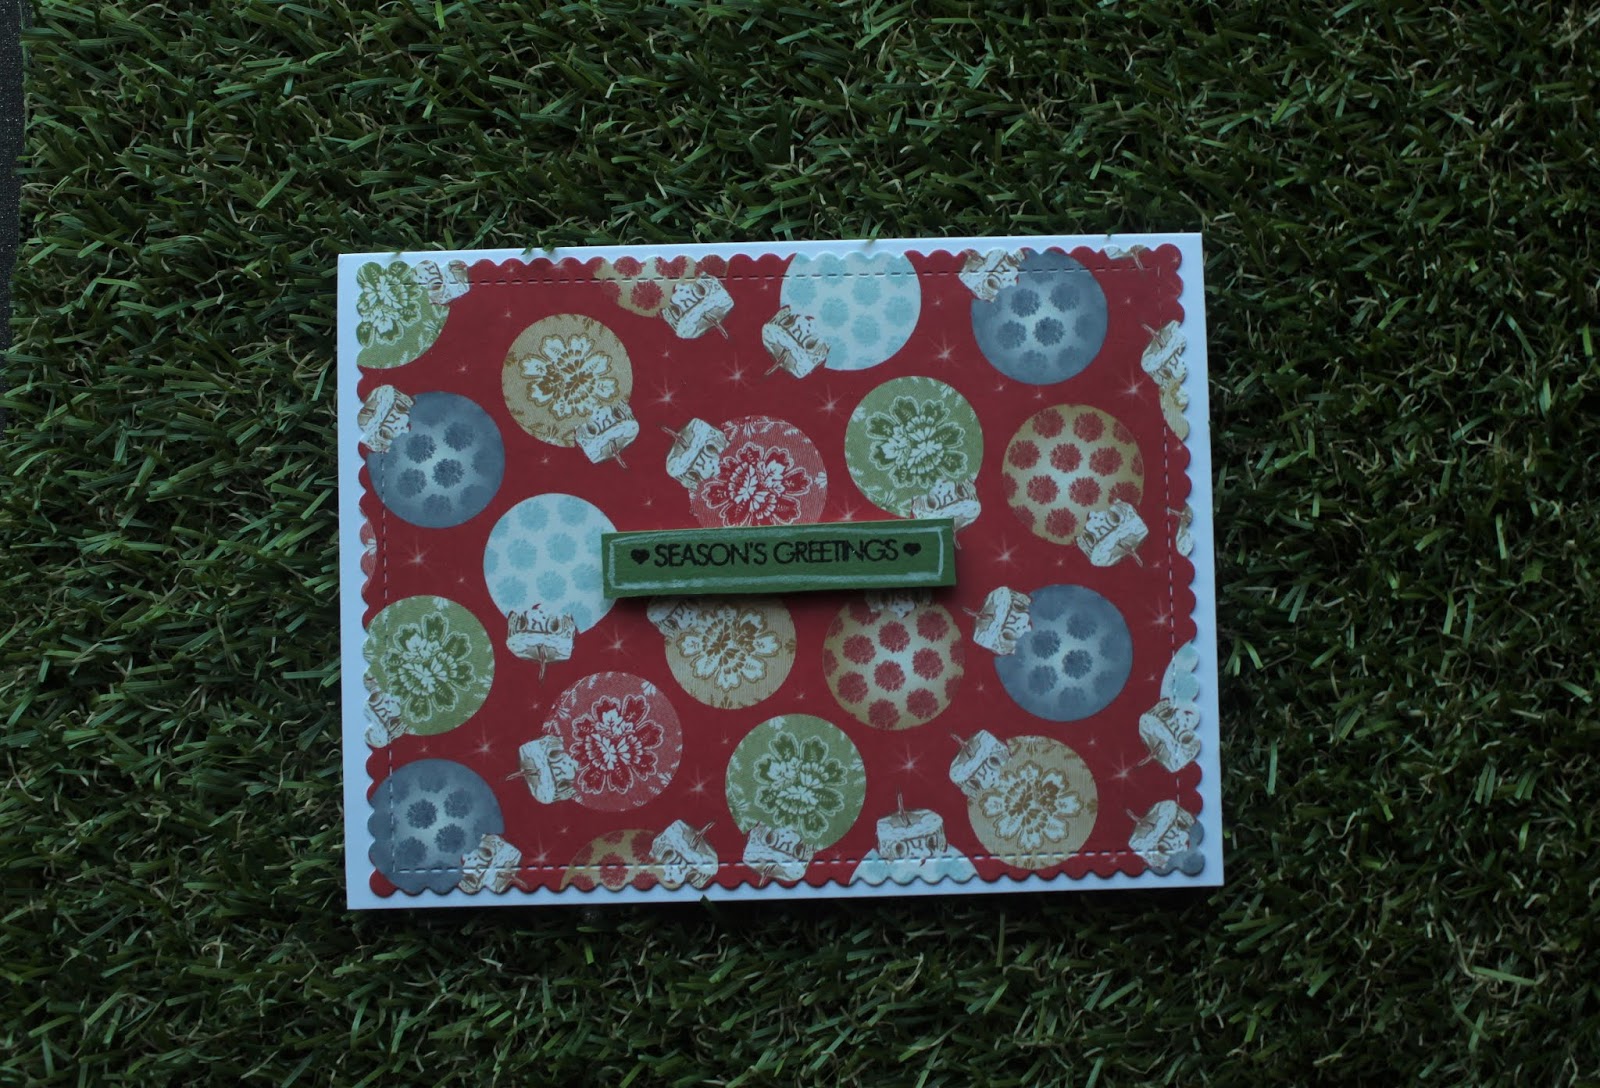
The ink combination with this card are: Altenew Ruby Red, Autumn Blaze, Lagoon and Moss on white card and pasted on red card stock base with a simple sentiment strip.


The ink combination with this card are: Altenew Lagoon, Dusk, Deep Iris and Mama Elephant Lollipop on white card and pasted on deep purple card base.  A simple sentiment strip is placed in the middle of the card.


The ink combination with this card are: My Favourite Things Cherry Crisp, Cornflower, Purple Plum and Daffodil on white card and purple card stock.  A simple sentiment on purple stitched circle.


The ink combination with this card are: Altenew Rubelllite, Orange Cream, Maple Yellow and Bamboo on white cardstock and orange card stock.  A simple sentiment on a yellow circle was placed in the middle of the card.


This card used My Favourite Things Sweet Tooth, and heat embossed with WoW Metallic Silver, Versamark and Delicata Gold on green card stock. The sentiment was black heat embossed on vellum with Sparkling Clear jewel from Pretty Pink Posh.


This card used My Favorite Things Sweet Tooth, and heat embossed with Wow Metallic Copper, Wow Metallic Gold and Hero Arts White


I hope you enjoyed the cards shared today. I really enjoyed playing with the Concord and 9th turnabout Dahlia stamp and will definitely made more cards using it. Really thankful to you for dropping by. XXX

22 Mar 2020

Altenew Beautiful Day on vellum with gold trim sides


Hello and thank you for dropping by. I really appreciated it. Today I am sharing two cards using the Altenew Beautiful Day stamped on vellum. Although both cards were made using the same stamp but were made for two very different occasions. One of the card is a sympathy card for a dear friend who has passed. I wanted to send a card to her family. The other card is an uplifting card and I sent it to a very sweet lady on her birthday.


For both cards, the Altenew Beautiful Day outline stamp was gold heat embossed onto vellum. For the sympathy card, I coloured the backside of the flower with Versamark pen and white heat embossed, hence the opaque flower. For the uplifting card, I coloured the backside of the flower with alcohol based markers. 


The sentiments, from Simon Says Stamp Handwritten Floral Greetings, were black heat embossed.


I really appreciated your time for stopping by. I know my blog is really not much compared to other card designers and you coming over really means a lot to me so thank you very much.

23 Feb 2020

Quick farewell card with background stamp and die cut sentiment


Hello. It's me again. Had a short break from work recently and did some catch-up on my blogging. A few of my colleagues left us for good recently and I made these farewell cards for them. One of them were with us for TWENTY years, his children were born here and is now starting university. I really wish them all the best in their future endeavours. As I am getting the whole team at work to sign the cards, I needed a bigger card so decided to do a 6x6 square card. 


These cards were pretty easy and simple to put together but it took me a few days as I did some stamping then left it overnight to dry and came back to work on the next bit the next day after work. I used Delicata Gold Ink with Hero Arts Floral Bold Print  background stamp for one card, and Versamark with MFT Roses All Over background stamp for the other card.


While the cards were drying, I did the die cutting.  There were three layers of die-cuts stacked together to give more dimension. A thick layer of glossy accents were added on top of the stack die-cuts for more shine. The shiner the better.


Finally, I added some jewels from Lucy Little Things Clear Iridescent Mix and Chunky Clear Iridescent Jewel, also Pretty Pink Posh Sugar Plum Mix.


Thank you for dropping by. I hope you find some inspiration from my blog today.


24 Jan 2020

Christmas 2019 - pattern paper background


Sorry for the long hiatus. I have been really busy. I just couldn’t find the time to blog. I still try to make cards whenever I can but blogging been taking a back seat as I wanted to let my physical self rest whenever I have free time and not burnt out. I generally craft & get the blog write- up done during my off days from work. But with short staffing at work, I couldn’t take time off. It does take a bit of time and effort to blog. Anyway, I made a bunch of Christmas cards this year with the little challenge I set myself and would like to share with you here. Hope you enjoy this very late post. I am really sorry for the bad photo quality here as it was really gloomy in November and December 2019 and I couldn't get any decent pictures.


I have this pad of beautiful Christmas theme pattern paper that I have for a while and been wanting to use them but years past and I have yet figured out how I wanted to use them. So I set myself a challenge to use them for this year Christmas card. Somehow, I ended using all the pattern papers as background.


For some of the cards, I added word dies and top up with lots of shine & gloss using Wink of Stella & Glossy Accents.


The following cards had various sentiment strips.


Shaped element were added to the remaining cards which I stamped with sentiment.


I hope you will find this post give you the courage and incentive to play with those pretty pattern papers instead of saving them for the perfect moments (which may never come)  or for fear of messing them up. I took the plunge and am happy with what was created.

26 Jul 2019

Peek-a-boo card


I came across peek-a-boo card from one of Jennifer McGuire’s video and was intrigued. Glad, I finally found time to make one. I am just sharing what I did, for details on how to make this type of card, pop over to Jennifer’s blog or youtube channel.


First, you need to cut 3 card with the following sizes: Front of the card (4¼ x 8¼ inch, scored at 2¾ inch), the inside of the card (4¼ x 8½, scored at 4¼ inch) and the back of the card (4¼ x 5¾ inch, scored at 5½ inch). 


Die card a circle window in the same position on the right half of the front panel and the inside panel. To do this, I temporarily taped the 2 pieces of card together and die cut them together. 


Next, I stamped the cow and pig on 2 circles that slightly larger than the die-cut circle and coloured the images. For the babies card, I just stamped the baby images directly onto the card as I did not like the card pieces getting stuck (even with the tape trick).


To assemble the card, tape/glue the back card and the inside card together first. Then line up the front card with by aligning the circle die cut and glue them together. The flap on the front card with the image with fit in between the inside card and the back card.

As you open the card, you will get the peek-a-boo effect. 


Hope you enjoy today’s post


7 Jun 2019

Box pop up card pony party


Hello and welcome! I have 2 box pop-up cards to share with you today. These are another fantasy theme card, with rainbows, ponies, unicorns and birdies having a FUN party in the clouds.


1) Like the last card, the first step is to die cut the Lawn Fawn Scalloped Box card pop up and the various panels.


 2) For the first card, keeping in line with the sky theme, I used star filled patterned paper from Forever Friends Christmas Snow paper pad for the side panels. For the second card, I used Forever Friends Spring Time paper pack to have a flowery spring feel.


 3) For the first card, the front panel of the card was die cut so that it is also a window card. Clouds were added to the inside panel with MFT Mini Cloud edges stencils and Altenew Sea Glass ink.


 4) Ponies were from Simon Says Stamp Mini Pony Party, the birds were from MFT Happy Hippos. Clouds were die-cut from Mama Elephant Rainbow High. For the second card, the clouds were die cut from tracing paper and coloured with copics from behind.


5) The sentiments were from Mama Elephant Make a Wish and Simon Says Stamp Mini Pony Party


6) Finally, all the images were put together onto the box pop-up card.


I hope you like today's cards and have a great day ahead!


3 May 2019

Pop up box card - Fairy Garden


Hello and welcome to my blog. I hope you will enjoy it. Today I am sharing my fairy garden with you. This is a box pop-up card. I did a box pop-up card a while back and a lot of people like it, and it was super fun to make. Hope you will give it a try.